Español
 Русский
 Francés
 Português
 ภาษาไทย
 Indonesia
 Việt
 العربية
 Melayu



Analysis Of Challenges In Birch Veneer Drying And New Approaches To Defect Mitigation
Analysis Of Challenges In Birch Veneer Drying And New Approaches To Defect Mitigation
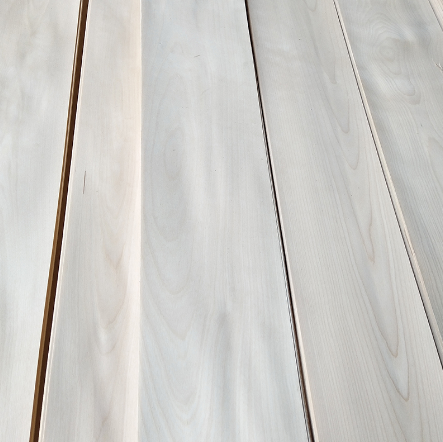
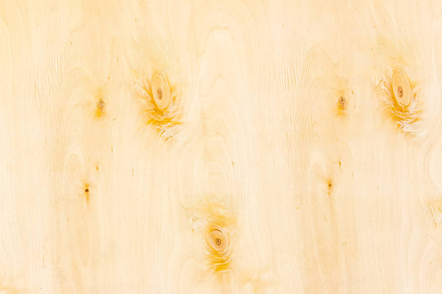
With its clean, light-toned base and fine, translucent grain, birch is highly valued for high-end applications such as decorative panels, multi-layered furniture boards, and piano backboards. However, the unique porous structure of birch—characterized by dense, fine vessels and a high proportion of thin-walled tissue—makes it exceptionally sensitive to drying stresses and fluctuations in environmental temperature and humidity. Many factories attempt to process birch veneer using drying parameters originally developed for poplar or eucalyptus, which frequently leads to various quality defects. Effective drying management goes beyond merely adjusting temperature and speed; it requires precise control based on moisture migration patterns, airflow dynamics, and the evolution of internal stresses within the veneer. This discussion covers key aspects of drying management, the root causes of common defects, and strategies for improvement.
I. Key Considerations For Birch Veneer Drying
1. Address the underlying stress from the rotary-cutting stage; do not attribute all defects solely to the drying process.
Many drying-induced cracks and wrinkles originate during the rotary-cutting phase. Because birch is relatively tough, improper knife angles or incorrect pressure-bar gaps during cutting can cause latent compressive stresses to build up within the veneer. Once such veneer enters the dryer, the loss of moisture triggers the release of these internal stresses, leading to splitting or cracking. Furthermore, there are significant differences between the heartwood and sapwood of birch: the heartwood is denser and more resistant to moisture removal, while the sapwood has a higher sugar content, making it more prone to discoloration when exposed to heat. Heartwood and sapwood veneers should be sorted and processed separately rather than mixed together on the drying line. Additionally, surface nicks from the cutting knife and inconsistencies in thickness can lead to uneven moisture evaporation rates across the veneer, further exacerbating drying defects.
2. Prioritize the quality of the hot-air medium; strictly control dust and oxygen levels.
Given the clean, pristine appearance of birch veneer, the requirements for the purity of the hot-air medium are far more stringent than those for standard mixed-species veneers. If flue gas from the drying furnace enters the air ducts, or if wood dust circulates with the hot air and adheres to the veneer surface, it can create a hazy, speckled residue that is impossible to wipe off. Furthermore, in a high-temperature, oxygen-rich environment, the soluble extractives within birch wood are prone to oxidation and discoloration. During production, dust removal and heat exchange systems must be monitored continuously; priority should be given to using clean, heated air (via a heat exchanger) rather than allowing direct-combustion flue gas to come into contact with the veneer. The moisture content of the circulating air must also be dynamically adjusted. In the middle and later stages of the drying process, one should avoid the prolonged use of low-humidity, high-velocity airflow, as this can seal the surface—creating a "hard shell" that traps moisture inside—a phenomenon commonly referred to as "surface hardening."
3. Balancing moisture migration in both transverse and longitudinal directions to minimize the disparity between the two sides of the veneer
Uneven exposure to heat and airflow on the top and bottom surfaces of the veneer is the primary cause of warping. In addition to balancing the airflow between the upper and lower nozzles, attention must be paid to the airflow distribution across the entire width of the dryer. Near the side walls, air is prone to backflow or eddy currents, which can cause veneers on the edges to either dry too quickly—leading to cracking—or remain damp due to insufficient airflow. Airflow deflectors can be used to fine-tune the air distribution, ensuring a consistent evaporation rate across the full width. In continuous dryers, transitions between temperature zones should be gradual; abrupt, "cliff-like" temperature shifts can disrupt the rate of moisture migration and cause stress concentration.
4. Managing the cooling and discharge process to prevent high-temperature veneers from being suddenly exposed to ambient temperatures
Many manufacturers focus exclusively on parameters within the drying zone, neglecting the cooling phase during discharge. When birch veneer is at a high temperature, its cell walls are in a relaxed state. If it suddenly encounters the cooler ambient air of the workshop, the surface cools and contracts rapidly, generating intense thermal stress. This often results in a fine, net-like pattern of cracks on the surface. Additionally, such rapid fluctuations in moisture content lead to uneven re-moistening later on. A controlled cooling stage should be implemented after the drying process, allowing the veneer temperature to drop gradually before it is moved to the equilibrium storage area. Conditioning chambers are not merely for storage; they must maintain a stable temperature and humidity environment. This allows moisture within the veneer to redistribute gradually, thereby releasing residual internal stresses.
5. Setting Differentiated Moisture Content Targets Based on End-Use
Different downstream applications for veneers require different optimal moisture content ranges. For birch veneers intended for use as face veneers or in pre-finished (painted/lacquered) panels, the moisture content should not be too low. Conversely, for veneers used in structural plywood—or those destined for shipment to arid regions—the moisture content can be set at a lower level. Applying a uniform moisture content standard across the board is problematic: it will either lead to moisture absorption and subsequent deformation during later use, or result in excessive brittleness, causing high breakage rates during processing. Target moisture content levels should also be fine-tuned to account for fluctuations in workshop humidity between the rainy and dry seasons.
II. Common Defects In Birch Veneer Drying: Causes And Targeted Improvement Strategies
1. Network-like Micro-cracks and Fine "Tortoiseshell" Cracking (Distinct from Simple End-Splitting)
Causes: During the middle and later stages of drying, the surface loses moisture too rapidly, forming a "hard shell" that hinders the outward diffusion of internal moisture; the resulting internal expansion exerts tension on the surface layer. Additionally, rapid cooling upon exiting the dryer creates thermal-shock stress, which compounds the stresses already present from the initial rotary-cutting process.
Improvement Strategies: Introduce controlled humidification during the middle phase of drying to soften the veneer surface and break down the "hard shell" effect. Slow down the rate of temperature increase during the middle and later stages, and reduce airflow velocity. Implement a "slow-cooling" zone to ensure that high-temperature veneers are not subjected to direct blasts of cold air. Regularly calibrate the pressure bar and knife gap during the rotary-cutting process to minimize the initial stresses introduced into the veneer. Veneers that already exhibit fine, network-like cracking should be downgraded, sorted separately, and excluded from the hot-pressing stage.
2. Localized Graying or Hazy Discoloration on the Veneer Surface (Without Clearly Defined Mold/Fungal Spots)
Causes: Accumulation of dust or fine carbon particles present in the hot-air stream; contamination of the veneer surface by oil mist or combustion gases due to leaks in the heat-exchange system; or prolonged exposure to high-humidity conditions, which causes internal wood extractives to slowly migrate to the surface. Improvement measures: Regularly clean dust from air ducts, heat exchangers, and nozzles; inspect and repair the sealing structures of heat exchangers. For biomass-fired heating systems, ensure effective flue gas filtration. During the initial drying phase, pass quickly through the high-humidity stage—where moisture is easily released—to avoid prolonged exposure to low-to-medium temperature, high-humidity conditions. Prevent raw wet veneers from becoming contaminated with soil; perform a simple cleaning of the veneer surfaces to remove dirt and grit before feeding them into the dryer.
3. One-sided warping or S-shaped twisting of veneers
Causes: Uneven thickness (thinner on one side, thicker on the other); uneven airflow across the width, causing one side to dry faster than the other; skewed feeding, resulting in one side being continuously exposed to more airflow; or an initial difference in moisture content between the top and bottom surfaces of the veneer.
Improvement measures: Install alignment/correction devices at the feeding station to ensure veneers are centered during transport. Sort veneers by thickness to minimize variations within each batch. Adjust the air deflectors on both sides to balance the airflow. Manually sort out veneers with significant differences between their top and bottom surfaces before feeding, and process them separately.
4. High internal moisture content gradient (dry exterior, wet interior), leading to blistering or delamination during hot pressing
Causes: Excessive machine speed resulting in insufficient drying time; a drying temperature profile that is too high initially, causing the surface pores to seal prematurely; or processing thick and thin veneers on the same line, where moisture in the thicker veneers cannot escape in time.
Improvement measures: For thick birch veneers, use a slower initial heating rate and extend the overall drying cycle. Implement a multi-stage humidity control strategy: high-humidity preheating, steady dehydration in the middle stage, and moisture conditioning/equalization in the final stage. Strictly separate production lines or batches for veneers of different thicknesses. Increase spot checks of core moisture content, rather than relying solely on surface moisture readings.
5. Appearance of pinhole-like indentations or pits on the veneer surface
Causes: Internal air bubbles or rapid vaporization of moisture within the wet veneer, which ruptures the cell walls; excessively rapid heating, causing internal moisture to boil and vaporize; or pre-existing defects in the raw material—such as insect holes or resin pockets—which become more pronounced after drying. Improvement measures: Implement a gradual temperature increase in the preheating zone to allow internal moisture to diffuse steadily, preventing rapid vaporization; reduce the hot-air velocity in the initial drying stage to slow down surface solidification; remove raw veneers containing insect holes or signs of decay; and allow wet, rotary-cut veneers to rest briefly to relieve internal stress before they enter the dryer.
6. Secondary blue stain or mold growth on dried veneers in storage
Causes: Final moisture content exceeds specifications; high humidity and poor ventilation in the conditioning/storage area; overly dense stacking, which prevents airflow to the core of the stack and leads to localized moisture absorption; contact with damp floors or walls.
Improvement measures: Strictly monitor final moisture content and re-dry any veneers that exceed limits; ensure regular ventilation and humidity control in the storage area; incorporate air channels within the veneer stacks and use pallets to elevate them off the floor, preventing moisture absorption from the ground; prioritize placing freshly dried veneers in well-ventilated areas, and avoid storing them alongside high-moisture, semi-finished products.
The drying of birch veneer is, fundamentally, a process of "managing stress, stabilizing moisture, and ensuring cleanliness." Unlike species where the primary goal is rapid dehydration, birch requires a steady, controlled rate of moisture migration. There are no fixed, permanent process parameters; instead, settings must be continuously adjusted based on factors such as the log's origin, the season of harvest, veneer thickness, and the operational status of the heating system. By focusing on often-overlooked stages—such as pre-rotary-cutting management, maintaining clean hot-air conditions, and implementing a controlled cooling/equilibration phase—one can consistently produce birch veneers that are clean, flat, and uniform in moisture content, meeting the rigorous standards required by high-end panel manufacturers.